My Mac SE/30 Is Back Alive
Or how I fixed my Mac SE/30 that was not booting unexpectedly
Updates
- [02 November 2020] This article was also featured on Hackaday : BODGE WIRE SAVES A VINTAGE MAC SE/30 FROM THE HEAP
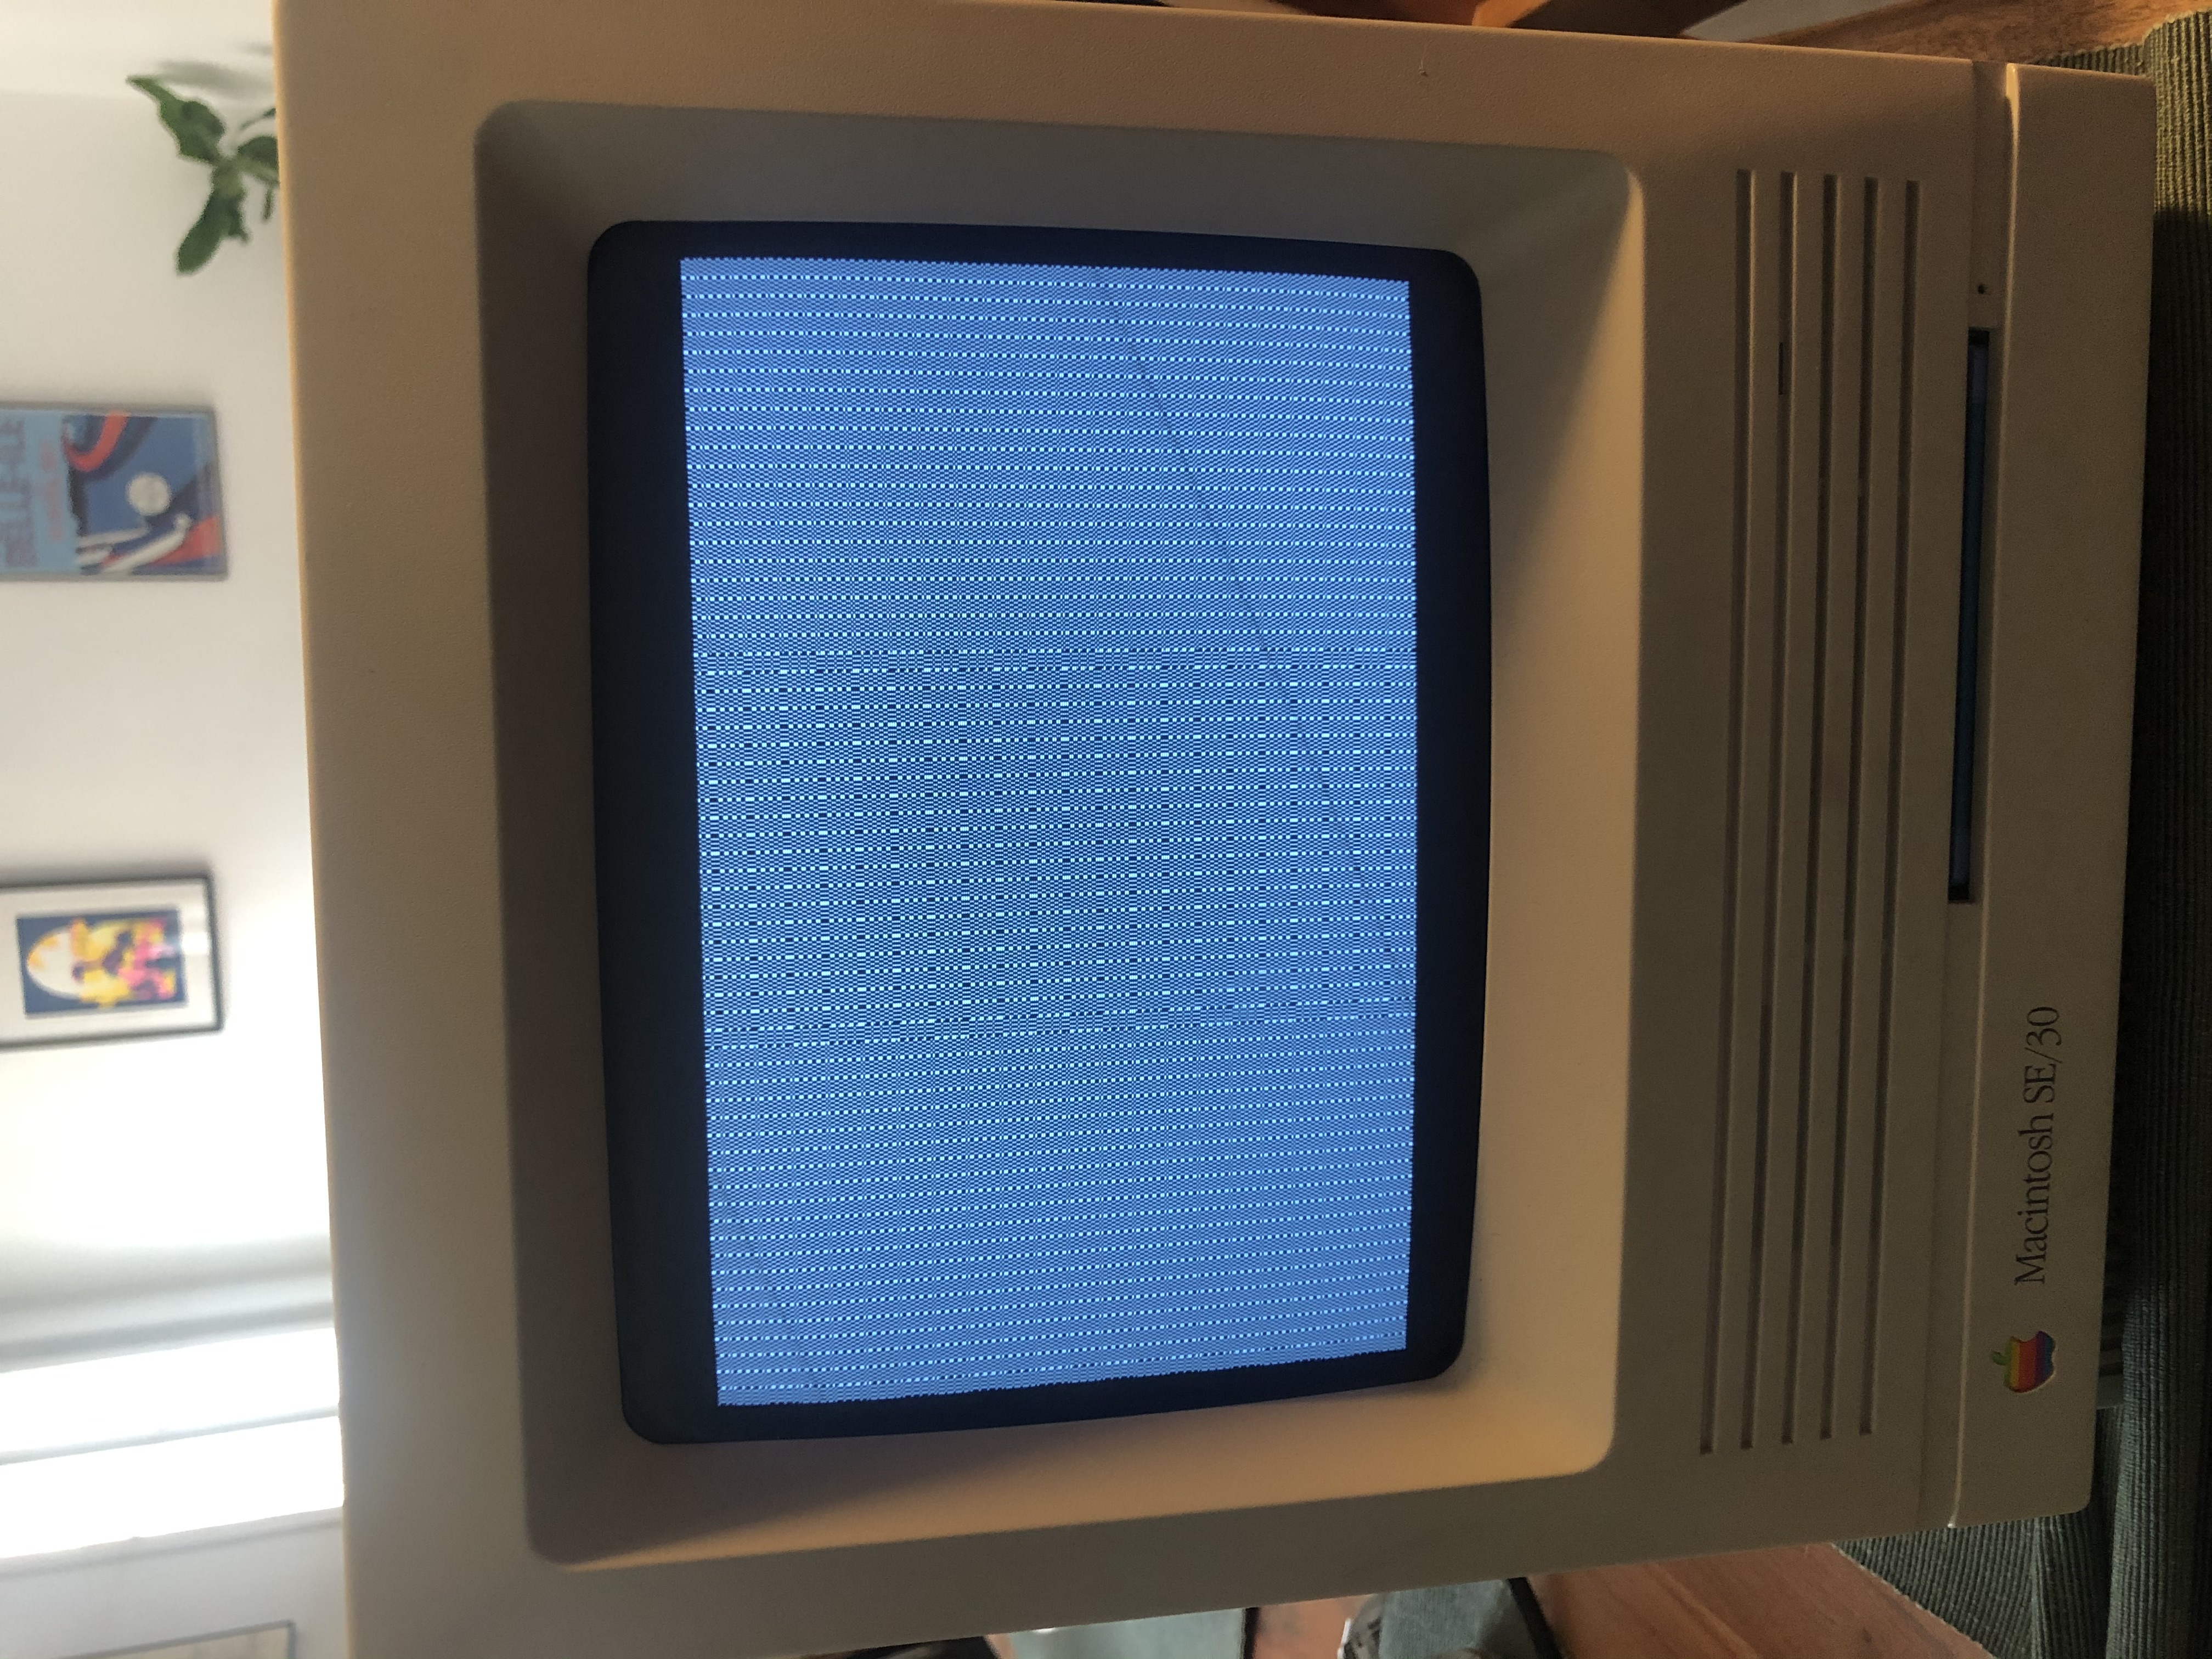
One day around a year ago I was playing with my SE/30 (the best looking computer ever) and I was trying to install Debian on it for fun. But after inserting some floppies and trying to boot from them the computer wouldn’t turn back on. I mean it would turn on but with weird static graphics and no sound at startup. I already had a hard time figuring out how I would boot Linux on that machine (which I succeeded at doing) that I did not want to spend more time fixing it.
Here is what I was left with :
A few weeks ago I really wanted to play again with my old Macintosh and experiment with A/UX, the first Apple unix OS ! So I started looking on the internet to see if the problem I had was common. And indeed it was ! I learnt it was called Simasimac and often happened because old electrolytic capacitors would leak. It could lead to two main things : traces could be connected together because this leak could be conductive, or it could corrode traces and make them not continuous anymore.
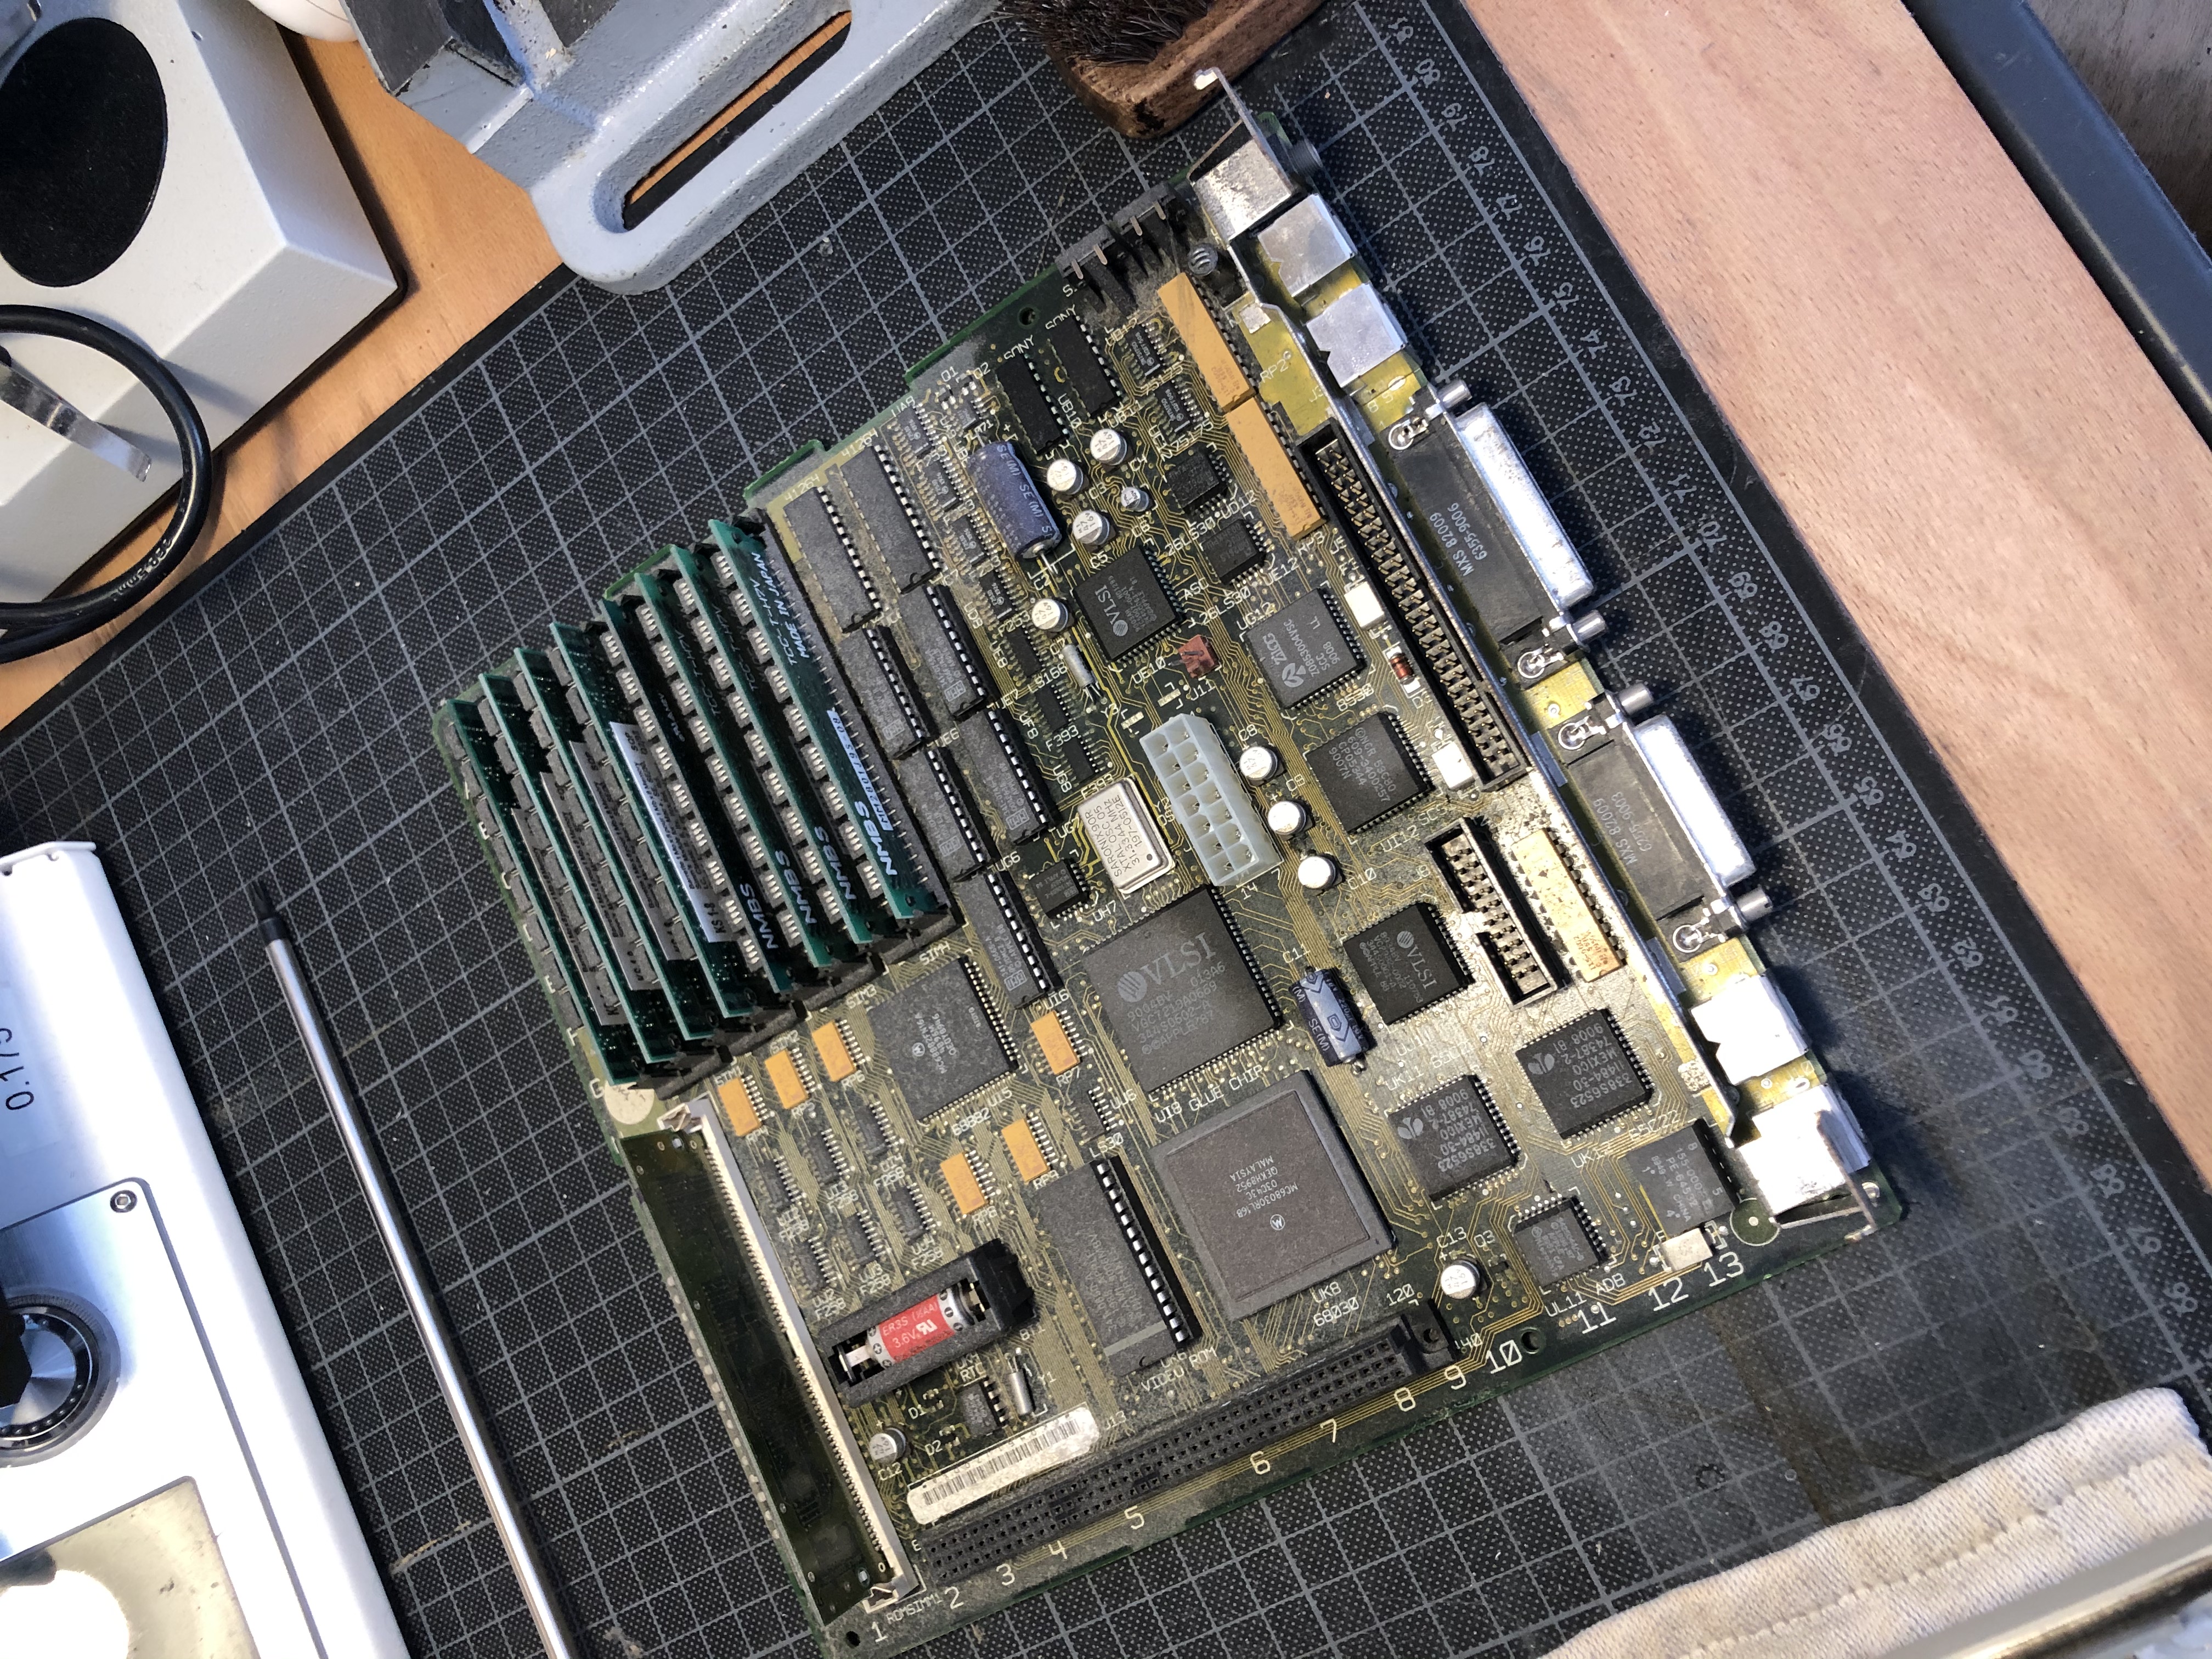
So I had to open my Mac SE/30 for the first time. Hopefully I had bought a few years ago the very long screwdrivers you need to open these vintage Macs. And after taking the logic board out I did notice some minor leakage but no sign of “cracks” on the capacitors. An easy solution I found on the internet was to wash the logic board in the dishwasher (crazy !?), and it happened to often solve the first problem of capacitor leaks : the short circuit between traces. As I had no dishwasher I took a tooth brush and wash the logic board under clear water insisting on areas with leakage. I let it dry for one big day, finished cleaning it with alcohol and tried to boot the SE/30 again. But it would still display those weird zebra stripes on the screen and would not boot.
The logic board before cleaning :
I also saw on the internet that a bad/discharged battery (the red one you see on the previous picture) could lead to boot problems and simasimac. I did not really trust this as I am convinced this is only used to keep time and some user settings (such as mouse speed) in a volatile RAM. And I knew it was discharged from a long time ago (even when the Mac did boot normally) because the Mac would not keep time when it was turned off. Anyway I would still need a new battery when the Mac would be back to normal so I bought one off Amazon, put it in and tried to boot again. But no surprise it still did not want to boot !
Later readings also taught me that if the simasimac stayed after Logic Board cleaning one solution could be to recap the all board. Thanks to this excellent article : https://recapamac.com.au/macintosh-se-30/ I was able to quickly buy the needed caps off DigiKey and receive them in less than 48 hours (even in France !).
For reference here are the parts I ordered :
| Capacitance | DK Part Number | Qty |
|---|---|---|
| 1uF | 399-3730-1-ND | 1 |
| 220uF | 1572-1103-ND | 1 |
| 470uF | 1572-1494-ND | 1 |
| 47uF | 399-18075-1-ND | 10 |
I would highly advise to recap your vintage Mac as soon as possible to avoid such issues I had (and that many others have). It could destroy your Logic Board and you could never boot you mac again. It’s quite easy to do if you have some equipment, patience and some little skills.
So I used my hot air gun to remove all these caps and most of the little one exploded. They do really smell awful when they do so, I would advise to do it in a well ventilated area. I have to say I was a bit scared to damage the PCB because some traces looked really fragile. I had some issues removing the axial capacitors because the original soldering tin was hard to melt. I’m not sure why, I tried to change temperature from 300 degrees Celsius to 400, but it was not really easy.
I then soldered back every caps, again axial caps where hard to put back because even with my desoldering needles I had a hard time putting the capacitors legs through the holes. Anyway, everything was soldered back :
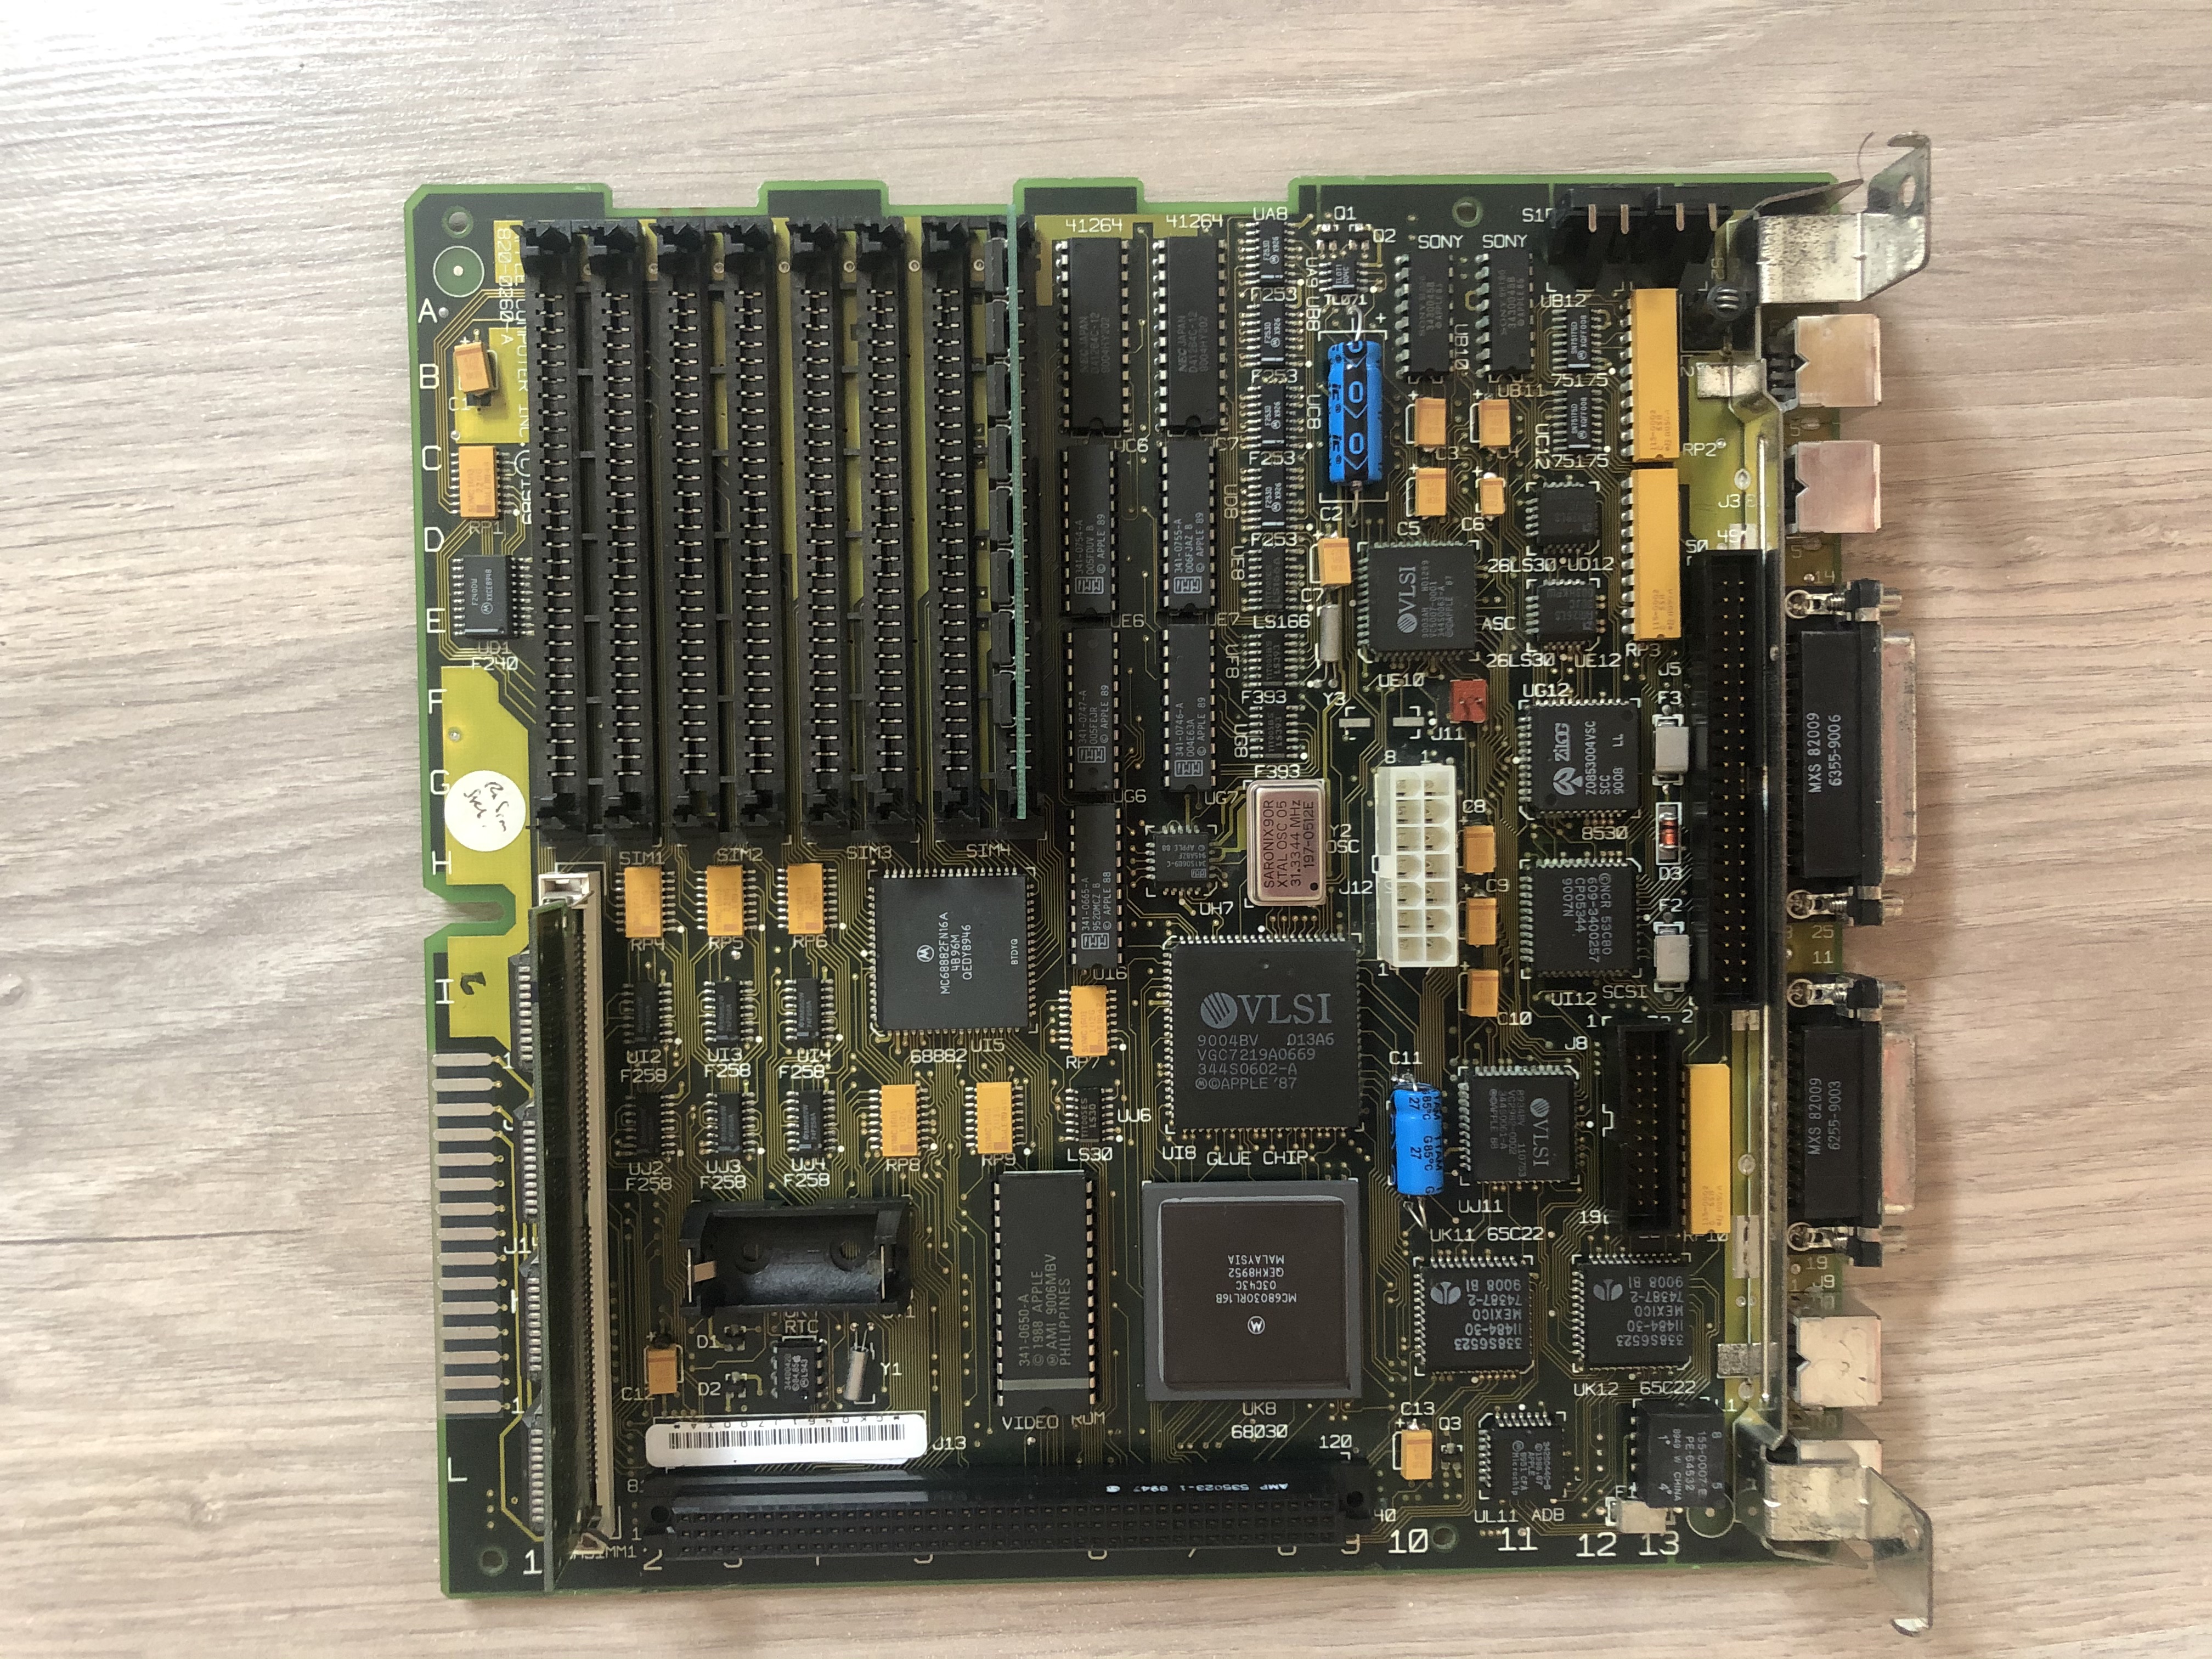
I’m not super happy about the result, contacts are well made and well soldered but capacitors are not always well aligned.
But I was super excited because I thought my problem was be solved. Most sites and articles I read said recapping was the ultimate fixing step. So I confidently plugged everything back and turned on my Mac. Nothing was fixed at all, it was still in the same state as the beginning.
So I was back to reading articles, blog posts, forums and reddit to find people having the same issues. I found out bad RAM chips could lead to my issue, so I started removing RAM bars or swapping them but nothing changed. So I posted to Reddit to get some feedback and advice : https://www.reddit.com/r/VintageApple/comments/jh5oo1/simasimac_even_after_recapping_any_hint_or_advice/
I learnt that it could be a problem with the ROM : either the chip itself or the traces between the CPU and the ROM. I did not really know where to start, so I searched for the SE/30 schematics and found them here : https://museo.freaknet.org/gallery/apple/stuff/mac/andreas.kann/schemat.html I noticed the ROM is directly connected to the CPU (which is in fact of no surprise and classical design as it is the first boot device). So I searched for the 68030 (CPU) pinout on Google and found it at the end of the NXP datasheet : https://www.nxp.com/docs/en/reference-manual/MC68030UM.pdf The next thing I had to do is to make sure each address trace, and each data trace was well connected between the CPU and the ROM socket. I used my multimeter in continuous mode and got the following pin mapping on the Logic Board :
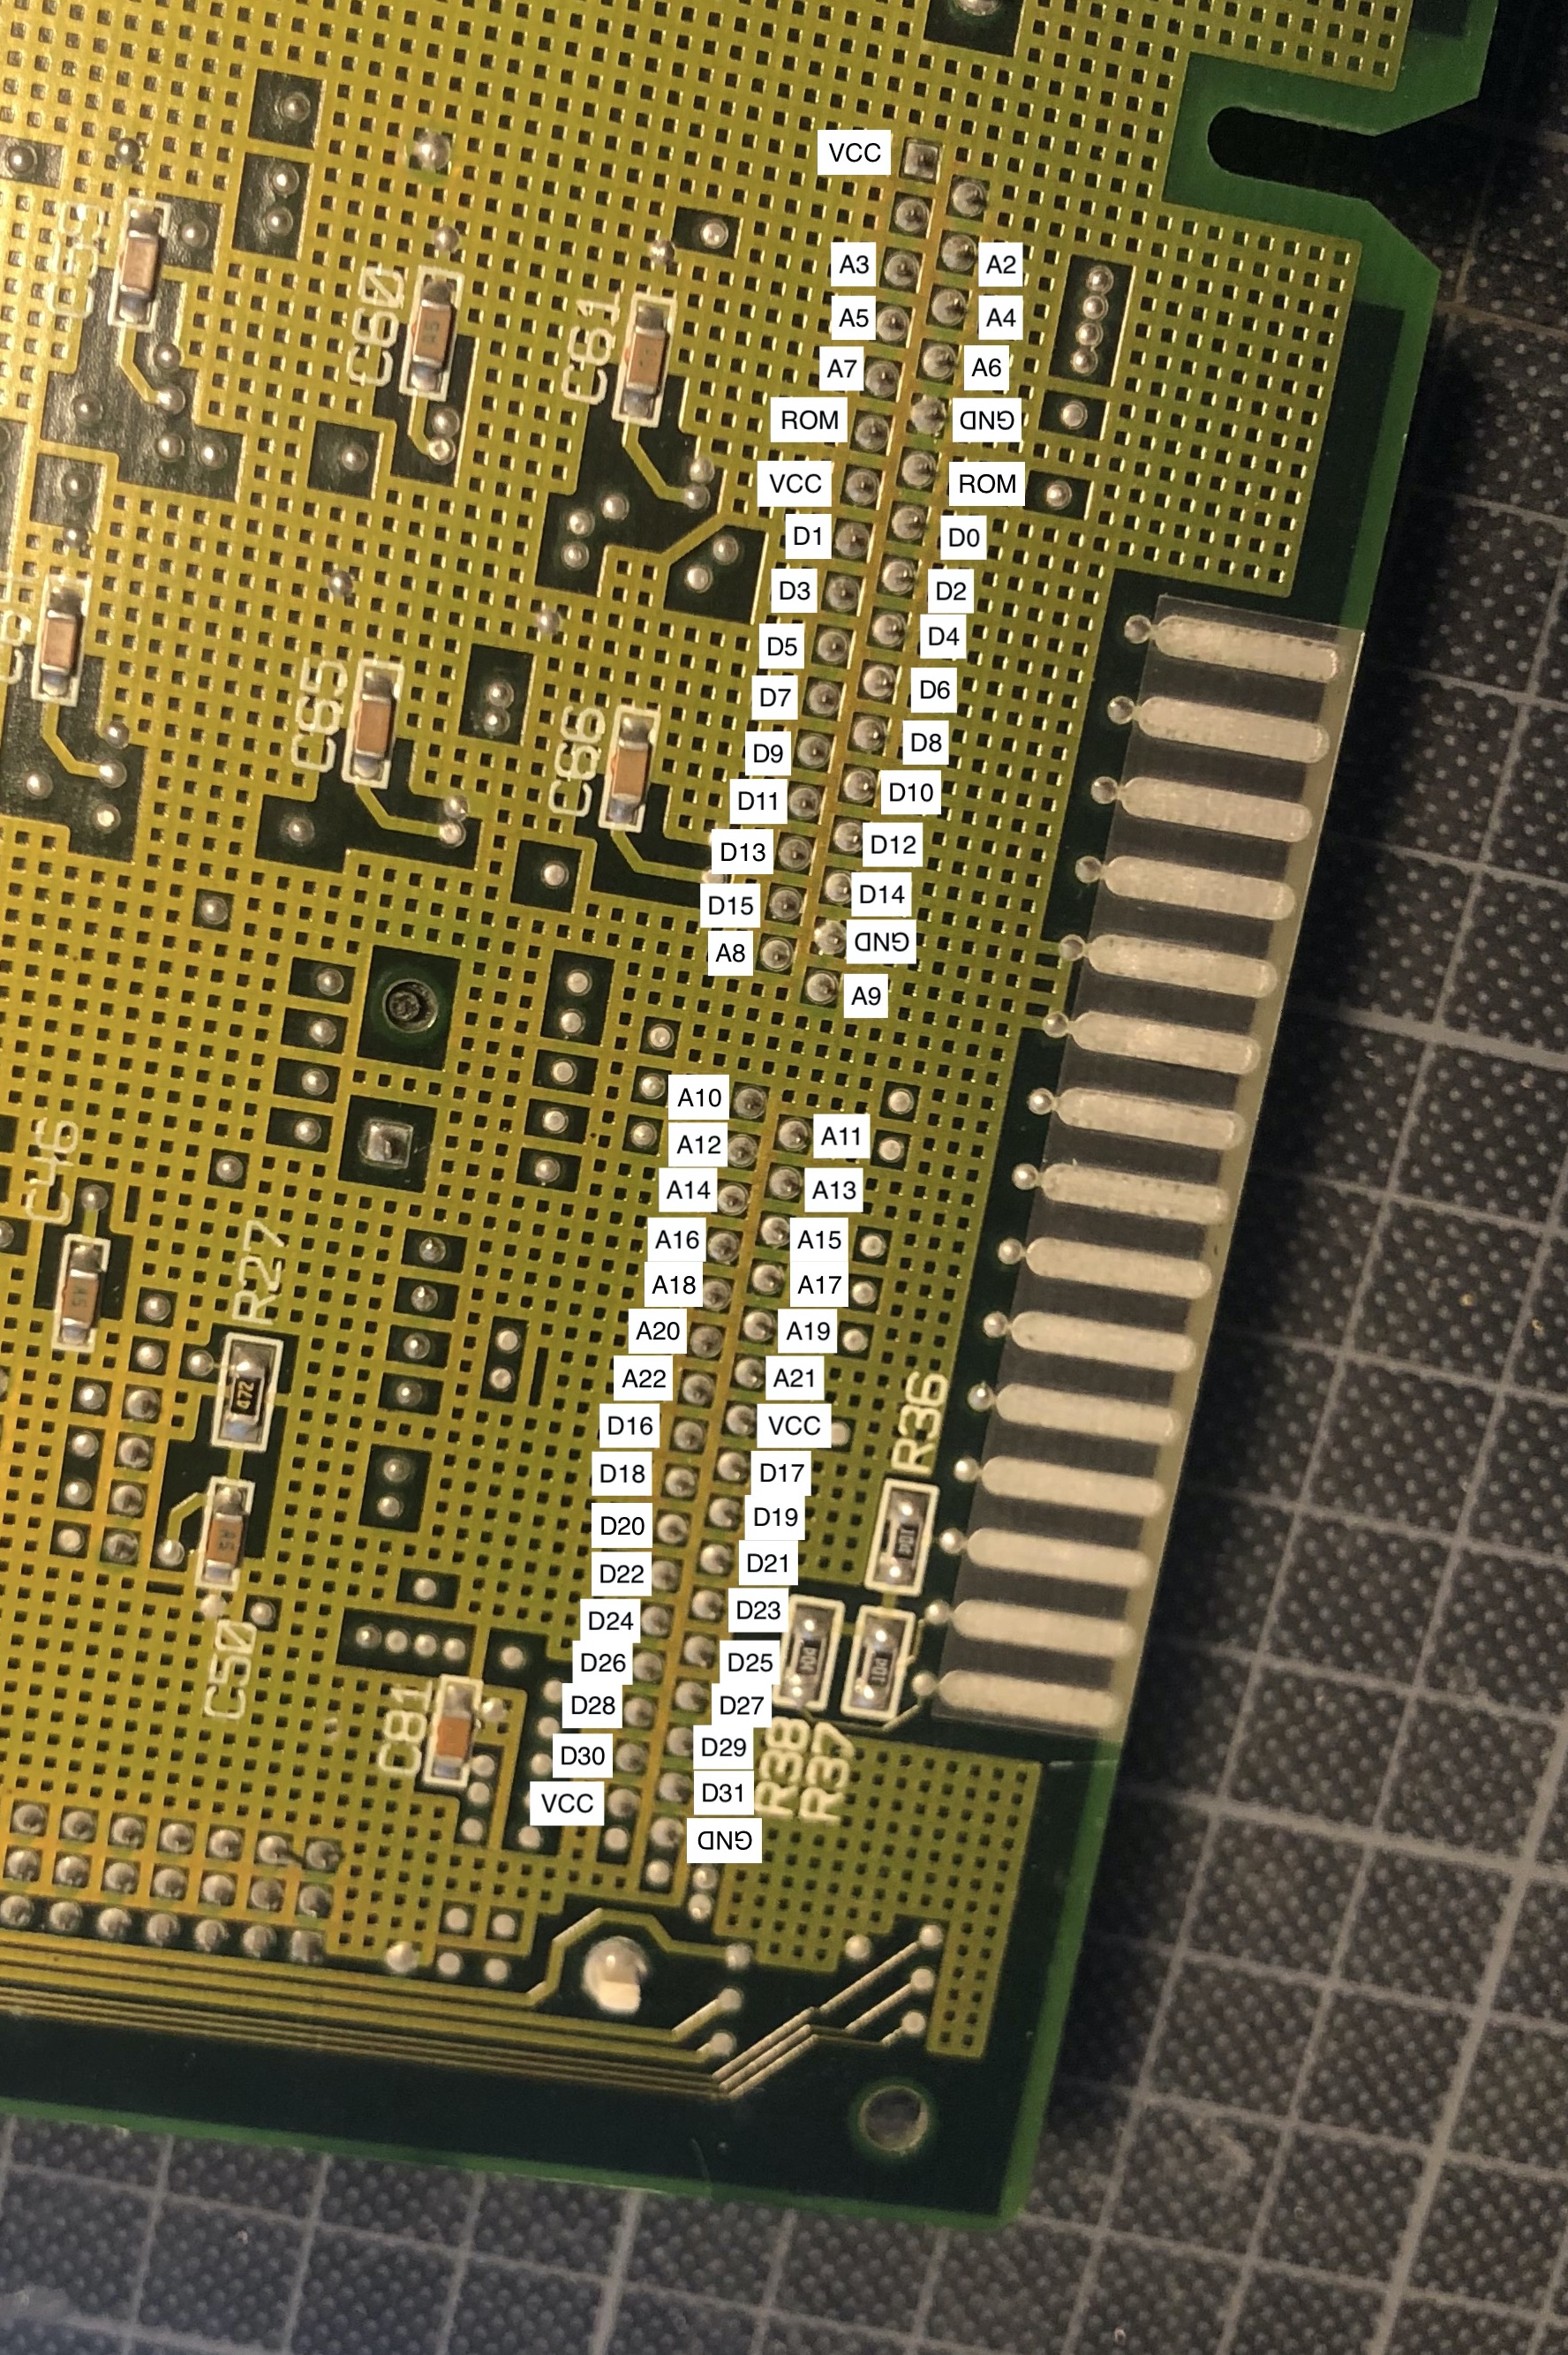
So I knew my CPU was well connected to my ROM. My ROM itself could have defects but I wanted to make sure every peripherals worked before buying a new ROM because they are quite expensive on eBay.
After some more discussion on Reddit I decided to do the same thing I did with ROM but for the RAM. If you look at the schematics you’ll notice that the connections between the RAM and the CPU is a bit more complex because it involves many more logic (for paging for instance). So I started to check the traces between the CPU and the Glue Logic Chip (which is the chip between the CPU and the RAM). Still using the schematics I noticed that not all address bus bits were connected between these two chips. So I tested the one that were supposed to be connected with my multimeter, and I found out that the A24 trace seemed to be not continuous :
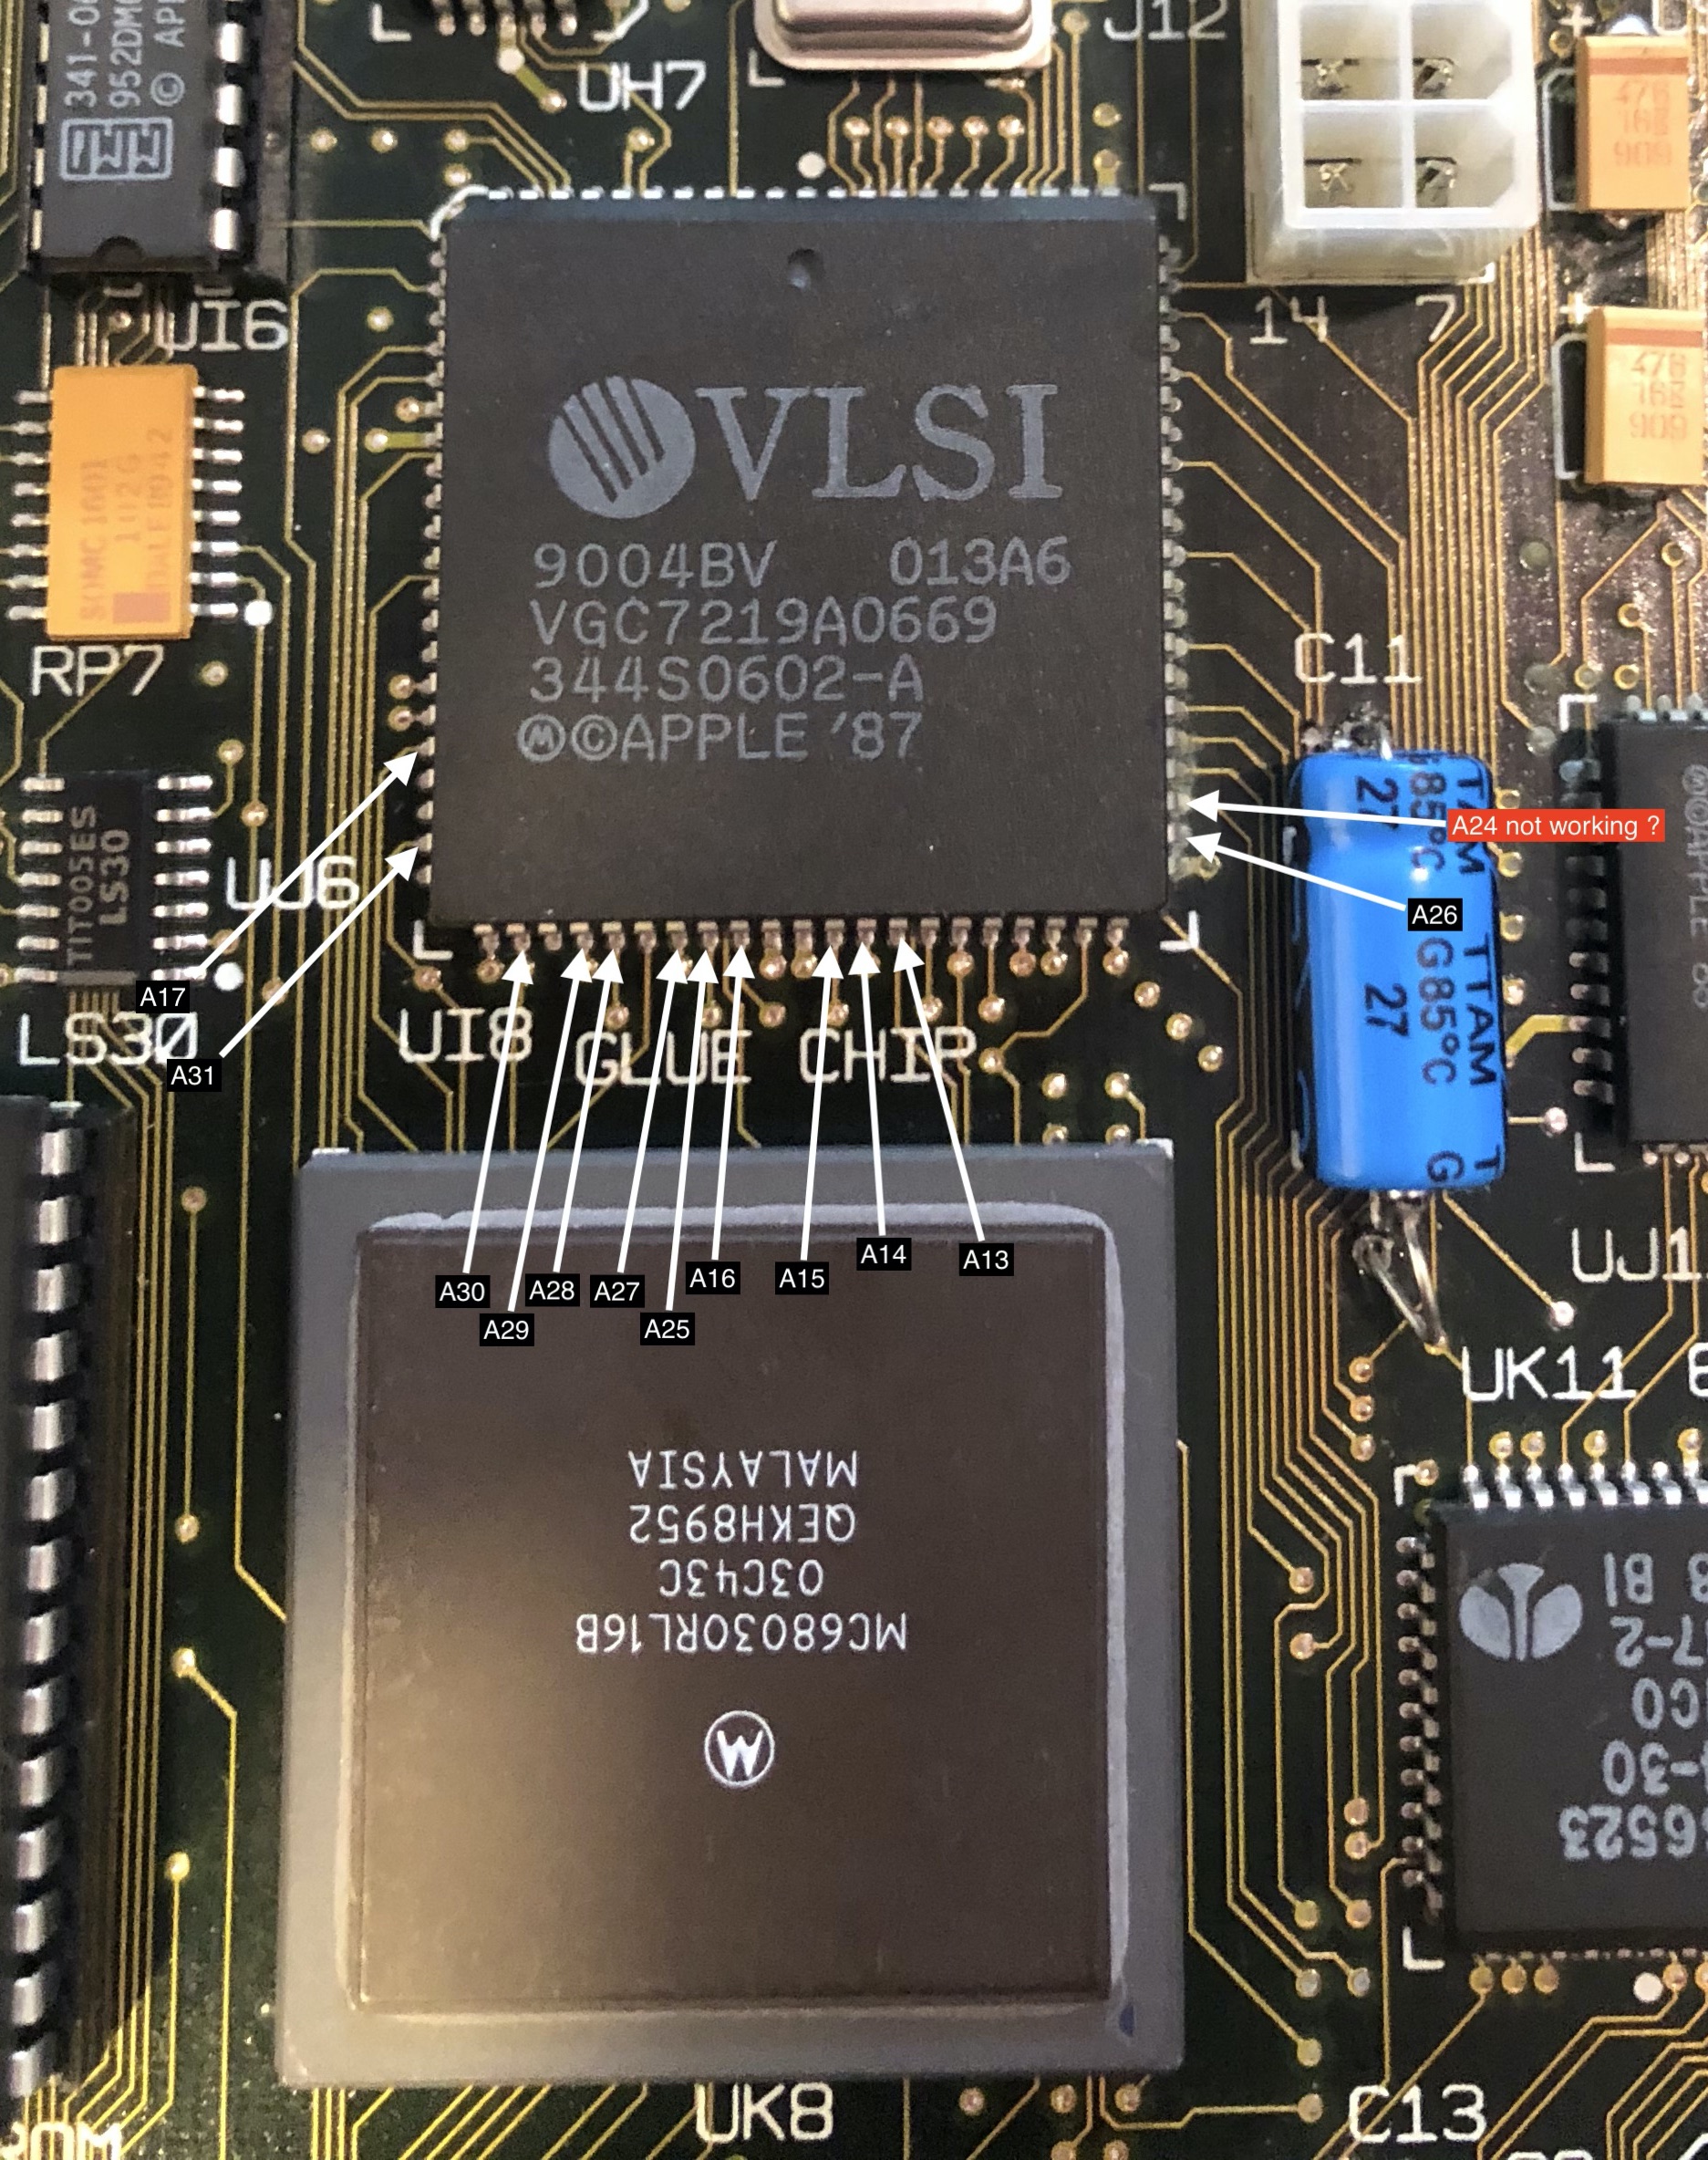
I was half surprised because the A24 trace goes below the C11 capacitor. And that non continuous trace could be explained by the fact that the old C11 capacitor leaked, and that the leakage corroded or destroyed the trace. So I did a hot fix with a stripping wire going directly from the Glue Chip to the CPU :

I then plugged everything back, and success !! It’s alive ! The weird zebra stripes had disappeared and it was showing the mouse cursor !
Unfortunately it does not boot from the internal hard drive, I’m not sure if I wiped it when trying to install Linux or not. So I created a new floppy boot disk with System 7.5. But unfortunately again the SE/30 does not want to boot from that floppy disk. I am still a bit confused as the floppy drive used to work really well. So I removed it from the Mac case and cleaned the drive heads with alcohol. But still, it doesn’t want to boot from my floppy. I guess the next step is to dismantle the whole floppy drive and give it a good clean. In the mean time I bought a SCSI2SD which will make everything easier and more reliable.
Thanks again to everyone on Reddit who did advise me well on how to spot the issue on my Mac SE/30. Today the floppy drive problem does not frighten me as I’m confident to fix it easily, and even if I don’t fix it I will be able to use the SCSI2SD to boot and use my SE/30.