68net : A Modern SCSI2Ethernet Board - Part 1
Want to discuss about this project ? Go here !
Introduction
I had been looking to connect my SE/30 to the internet but I struggled to find PDS boards that would fit in it. It is particularly difficult as such boards are rare, but there is also very little space available in the SE/30, so most cards won’t fit in. Apart from the internal PDS port the SE/30 has another expansion port : SCSI, which is an improved parallel port. It is available at the back of the computer as a DB25 port. But all SCSI to Ethernet devices from back in the days that I found were missing floppies with drivers. Moreover most of this stuff was in the US so shipping would be really expensive. Then I found about scuznet, a modern design by @saybur. It was really interesting because it was made to work with an unpatched Nuvotech driver. But there was a few things I did want to change/improve to the design, including the fact that it would be really cool to be able to upgrade the firmware by USB so that the community could easily develop and upgrade the firmware.
The goals of this project is to make a cheap, open source, community driven, and reliable board.
This is the original design by @saybur :
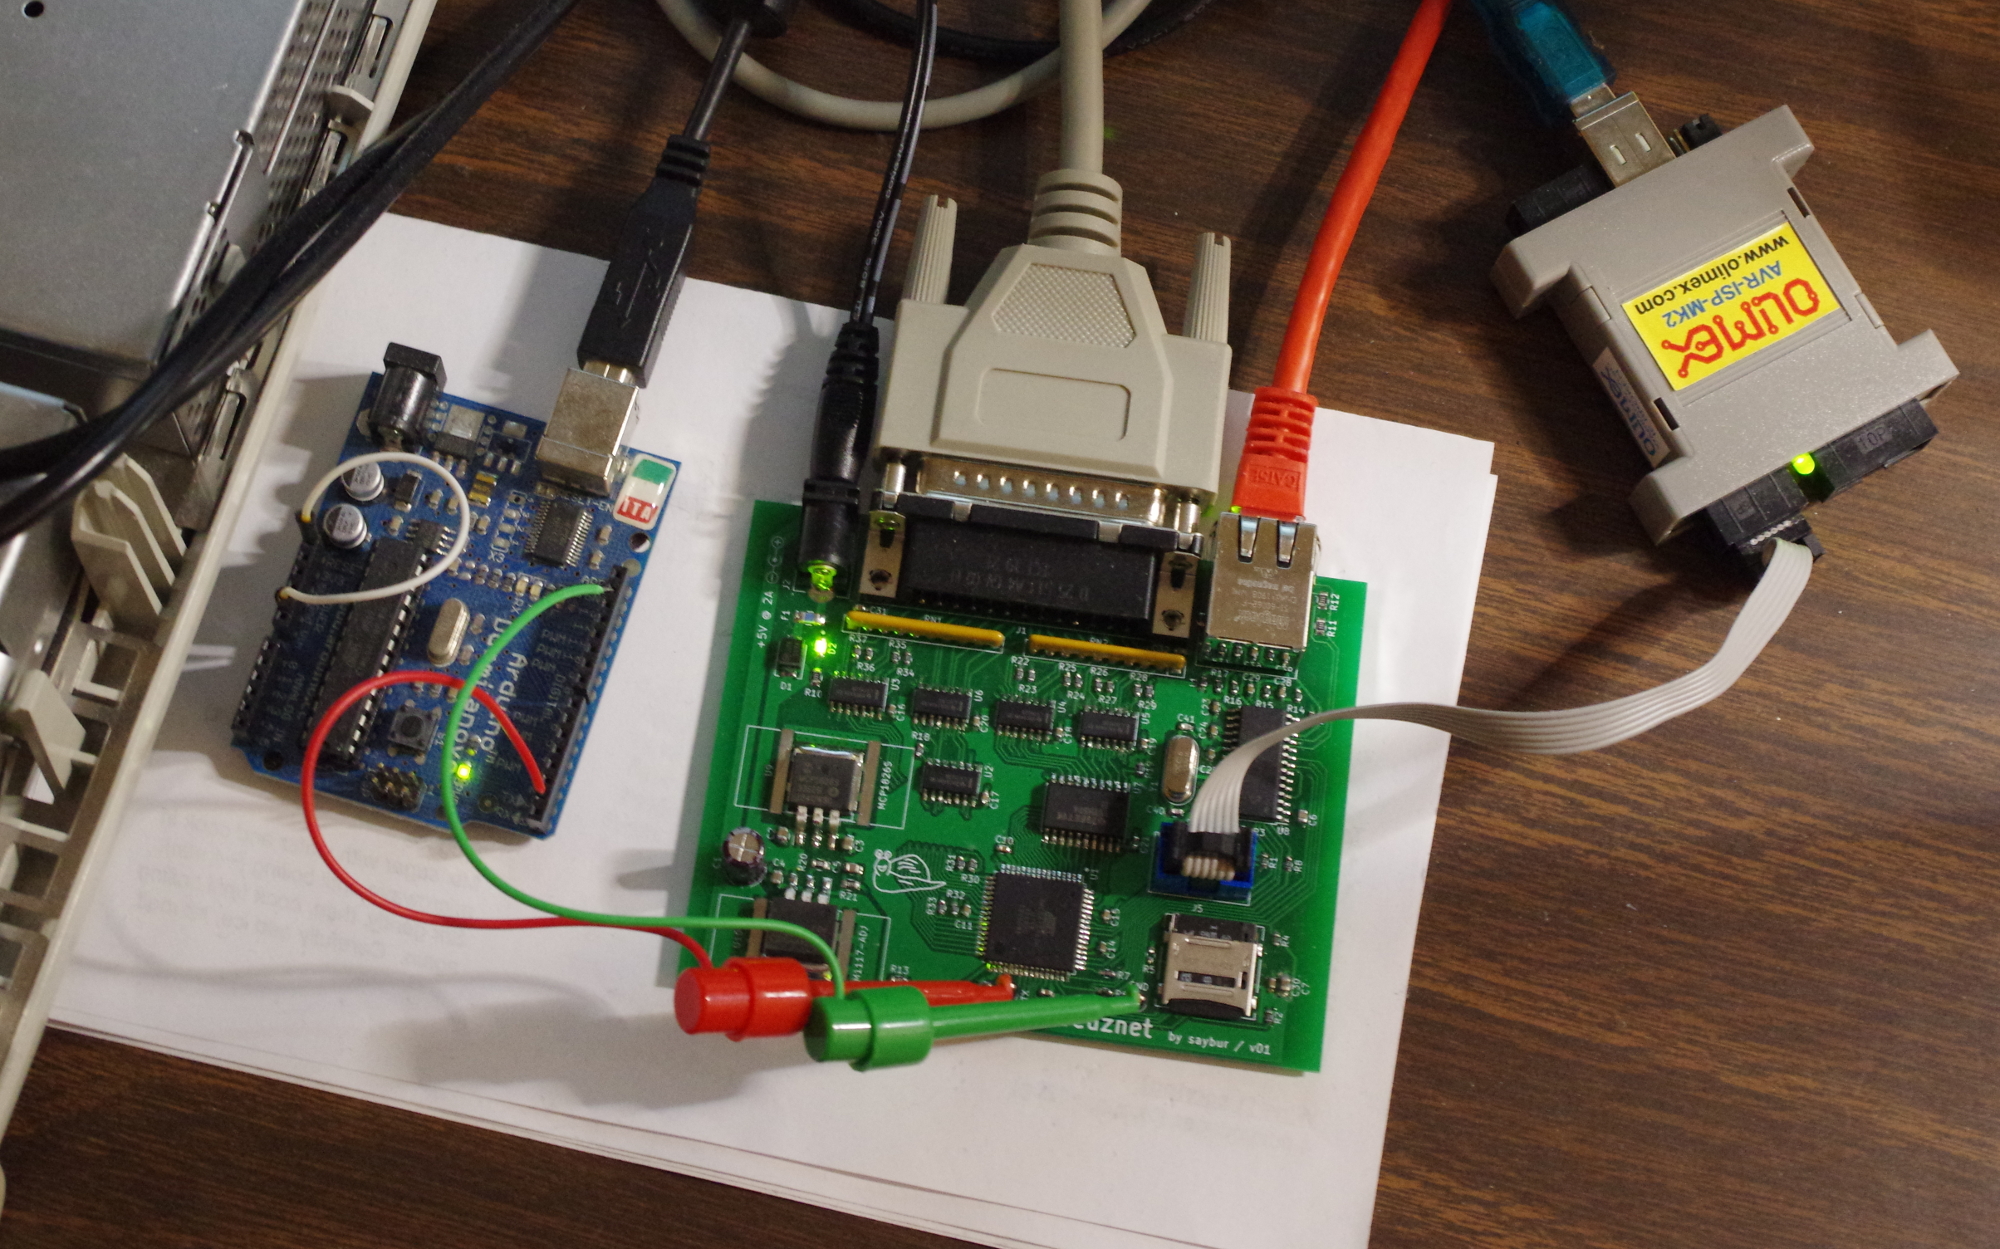
So I decided to create a new design based on this. Here are the main things I changed/added to the original design :
- The microcontroller is replaced by a STM32 (ARM chip) that will be upgradable by USB. In the future it also means a firmware could handle Ethernet over USB, and you could share files between your modern computer just by connecting to you vintage mac by USB;
- The board is self powered by the SCSI
- In case external power is needed (such as on the Macintosh Plus I guess) it can be provided by USB (instead of a power jack on the original design)
- I added mouting holes to the PCB so that we can design an acrylic case later;
- I removed the SD Card slot because I like things that does a simple task but does it well (Good design is as little design as possible)
- Designed in Kicad 5 (instead of Kicad 4)
On my design, power can be provided by the SCSI bus or/and the USB port. The board has some circuitry that automatically switches between these two sources, so for the end user it is really convenient. On a Mac that has a stable SCSI 5V you just have to plug the board, on other Macs plug the board and connect the USB port to a USB wall charger and that’s it. It also means the board can be connected to the turned on Mac while updating the firmware, which will also be super convenient while developing a new firmware.
SCSI Termination is for the moment always enabled, I do not see this as an issue. If I discover that it should be software controlled I will tweak the design in the future.
Here is what the final board could look like :
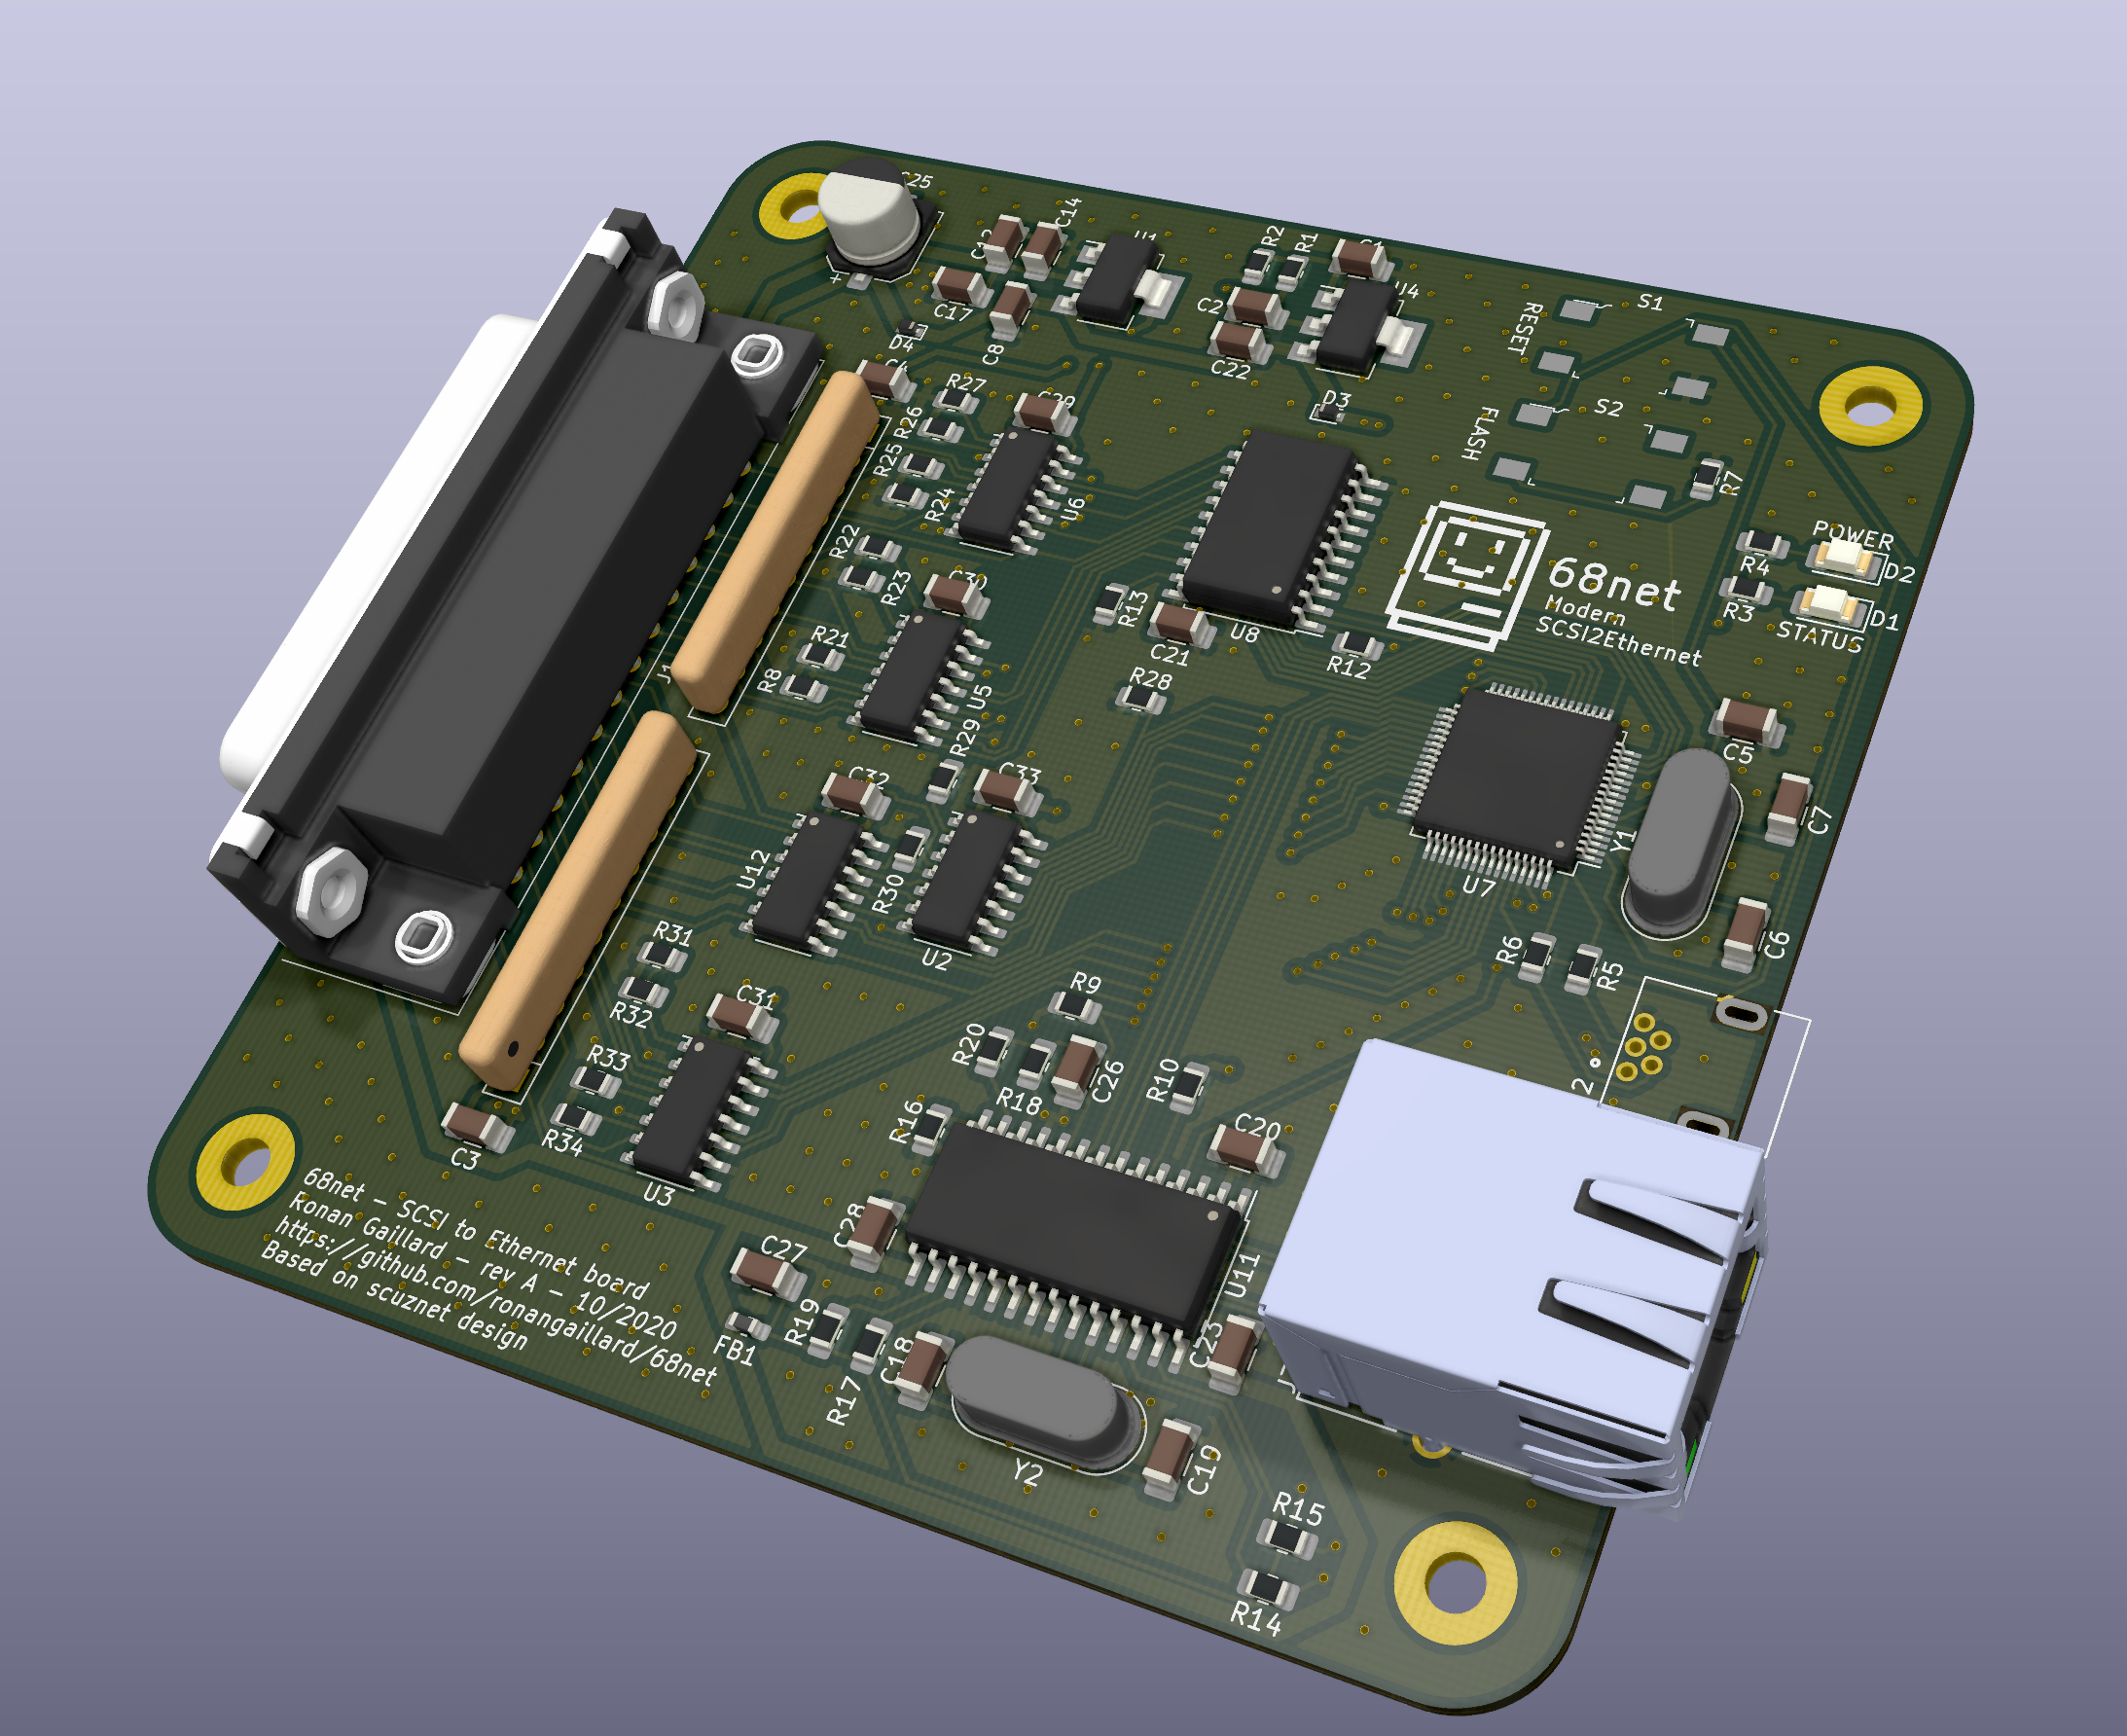
That design is available on my GitHub.
Next steps
- Wait for some feedbacks and eventually tweak a bit the current design (~1 week)
- Manufacture some boards and assemble them (~1 month as boards will get manufactured in China)
- Write an initial firmware and make sure design works as expected (~1 week to get basic stuff running)
- Port the Nuvotech protocol to the board (and find a way to make it work with A/UX if time is found) (timing depends on so much things)
- Try to distribute the board as a kit or pre-assembled (timing depends on so much things)
On The Technical Side
Schematics are available here (may not be up to date, check on my GitHub for latest content).
The design is based around an STM32F072R8, for three main reasons :
- it’s an ARM chip, so development tools are open source and powerful (and I have experience with STM32 as well)
- it has an USB DFU bootloader, so any end-user will be able to upgrade the board without expensive hardware flashing tool
- it has a lot of GPIOs that is necessary to talk using SCSI
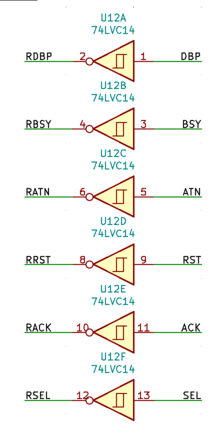
The signals between the STM32 and the SCSI are divided into three main categories :
- SCSI -> STM32 (ATN, ACK, …) : these are unidirectional signals from initiator, I use a 74LVC14 chip to do the level conversion. Indeed the SCSI bus communicates at 2.85V but some peripherals can talk at 5.5V, so we need to protect the STM32 which does not have a lot of 5V tolerant GPIOS.
- STM32 -> SCSI (CD, IO, …) : these are unidirectional signals from target, I use multiple 74LVTH126 to drive these control pins in Open Drain, this make sure no device on the bus can be damaged in case of multiple devices talking at the same time. This also make sure the board talks at the 2.85V SCSI voltage.
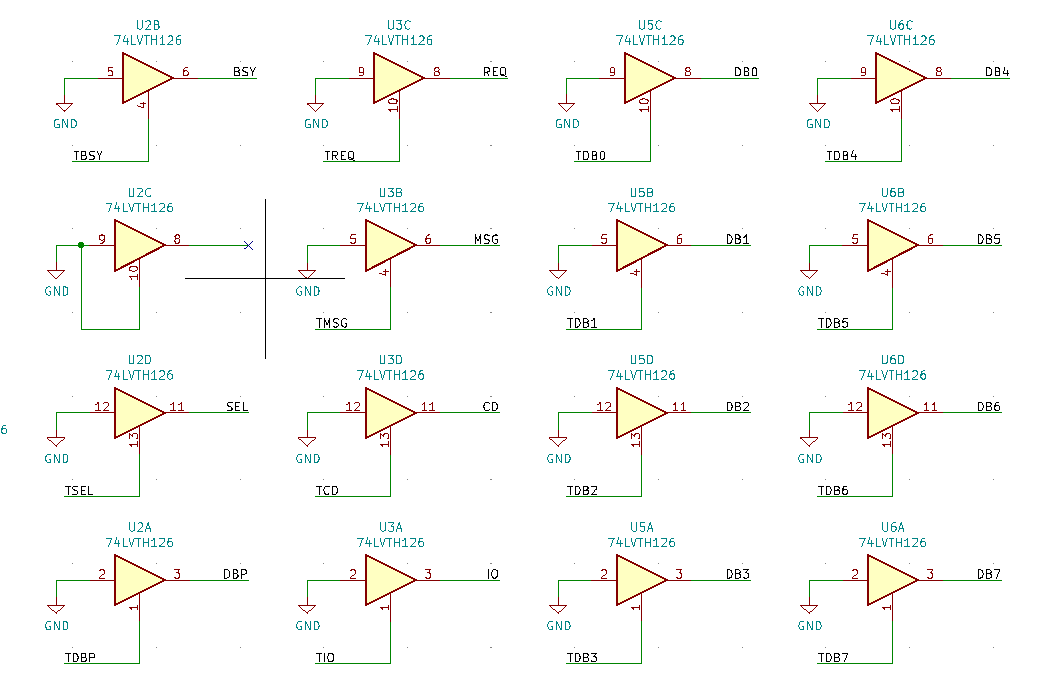
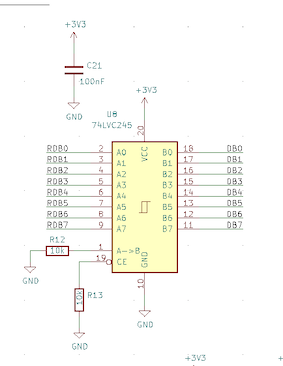
- STM32 <-> SCSI : bidirectional signals that will use the 74LVTH126 and the 74LVC14. One particularity is the data lines. You may have noticed that the 74LVC14 inverts the signal logic. This is not an issue for control lines, as software can handle inverted signal with simple
not. The problem for the data lines is that you often want to transfer the data received as quickly as possible to your peripheral (here the Ethernet chip). If you want to be fast you don’t want tonotall received data before transfering, that’s why you’ll see the 74LVC245 chip handling the received data line that does the level convert without inverting the data.
You may now wonder where does the 2.85V comes from. I use a simple adjustable LM1117 to generate it, but you may notice that it produces something more like 2.63V. It is due to the fact that termination resistors (RN1 and RN2) are supposed to be 110ohms, but 110ohms resistor networks are not available at the time of writing on DigiKey. So I chose the nearest available value which is 100ohms, and for that value the voltage should be 2.63V. (and yes SCSI devices need a termination to avoid reflection).
The rest is relatively classical design, the STM32 is connected to the Ethernet chip ENC28J60 by SPI. You can also notice the two schottky diodes managing the input voltage (USB and SCSI TRMPWRP) with a low lost voltage.
Don’t hesitate to give some feedback here !